

Until now, handling invoicing for a TOWeb e-commerce site meant juggling between the back-office and a spreadsheet, external accounting software or hand-written emails. Copying amounts, formatting invoices, sending them one by one… A slow, error-prone and not very professional process.
With TOWeb 14, those days are over. Your site's back-office now includes a complete invoicing system, with your company settings and automatic generation of numbered invoices sent to your customers in one click — all without leaving your web browser.
No third-party software to install, no extra subscription: invoicing is included in the e-Commerce edition of TOWeb.
Why it's a real plus for your business
An integrated invoicing system turns a time-consuming administrative task into an automated, reliable, value-generating process:
- Time saved — no more copying order details into another program
- Zero errors — amounts, taxes and customer details are taken automatically from the order
- Professional image — your invoices carry your logo, your contact details and your legal notices
- Compliance — sequential numbering, mandatory information (SIRET, intra-EU VAT number), archiving
- Customer satisfaction — your customer receives their invoice immediately, in the confirmation email
- Traceability — every invoice is archived and can be viewed from the back-office
- No external dependency — everything is hosted on your own server, with no third-party cloud service
How to enable and use invoicing
Step 1: Enable it in TOWeb
In TOWeb version 14.04 (or later), go to the Back-office > Orders + Invoices step and tick the "Create and manage invoices" option.
Then publish your site so that the online back-office includes this new feature.
Step 2: Set up your invoicing details
Log in to your site's online back-office. On the Orders page, you will notice a new blue "Invoice settings" button at the top right.
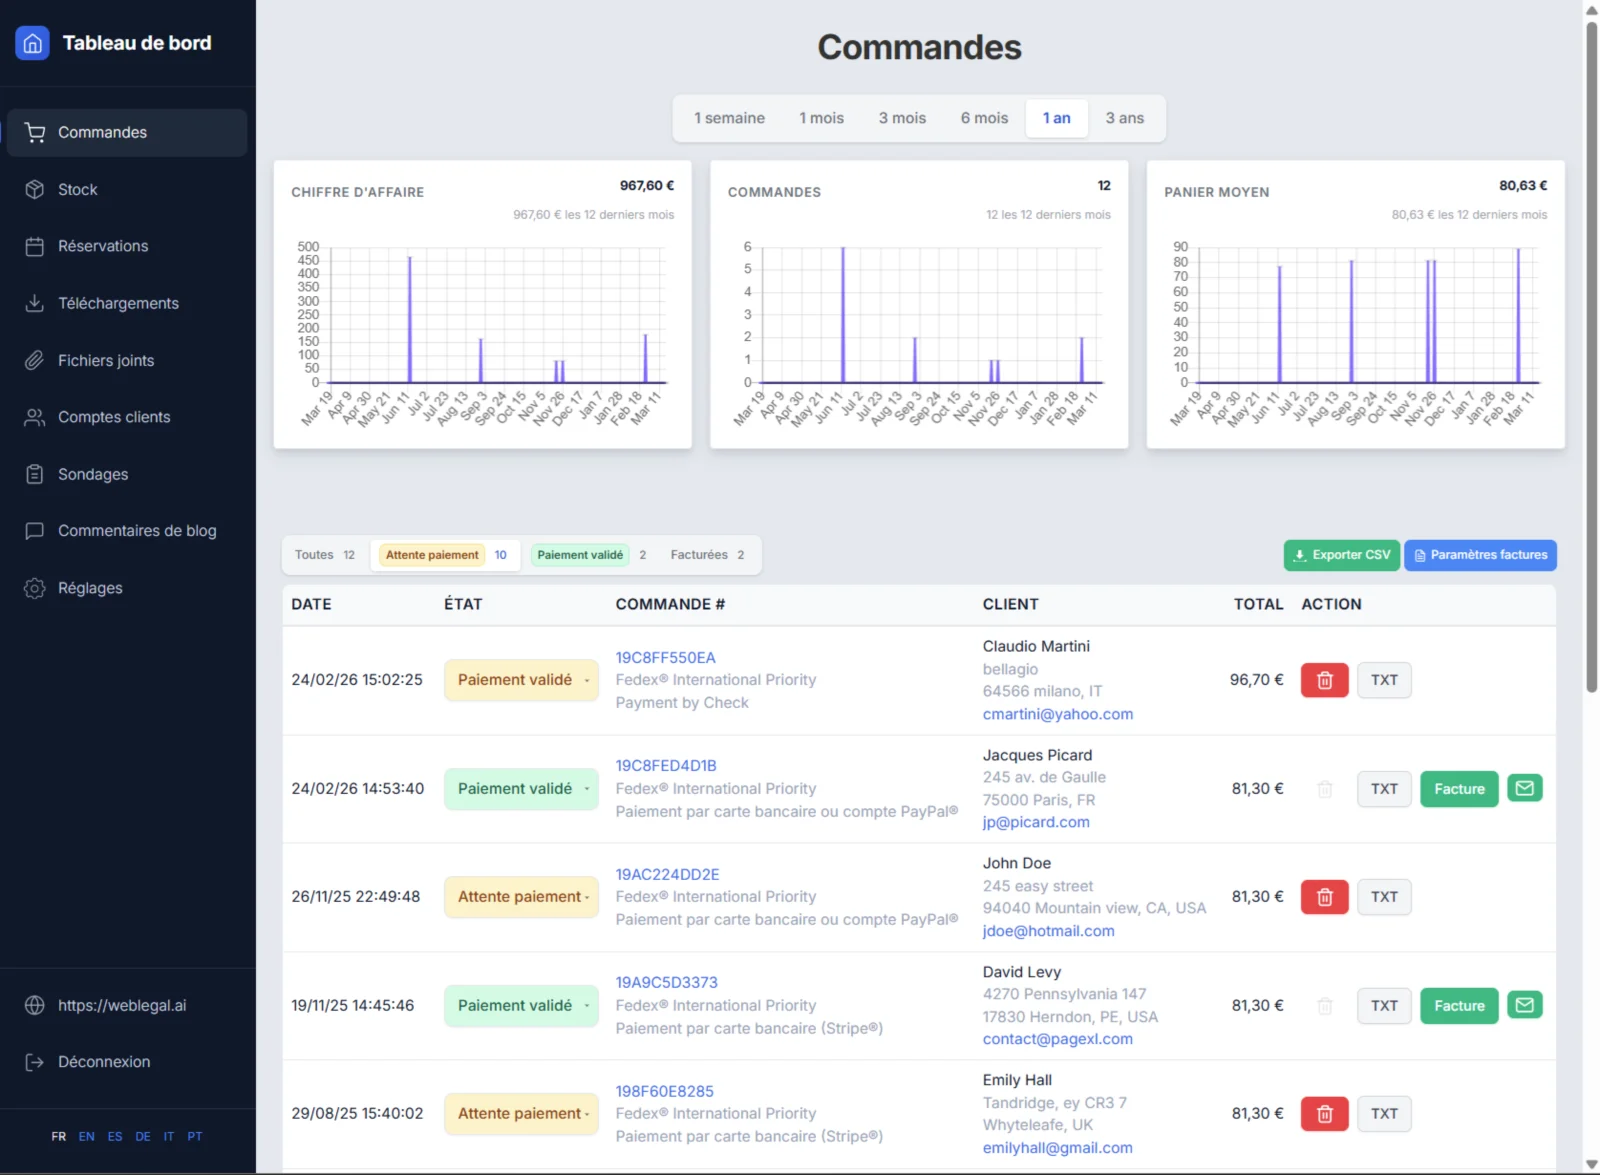
Click it to open the Invoice configuration page. Fill in:
Your company information:
- Company name
- Full address (street, postcode, city, country)
- SIRET or registration number
- Intra-EU VAT number
- Contact phone and email
- URL of your logo (it will appear on every invoice)
Your invoice numbering:
- A customisable prefix (for example FACT-, INV-, or your company name)
- An optional suffix
- The number of digits (e.g. 4 → invoices will be numbered 0001, 0002, etc.)
- Automatic reset at the start of each new year
- A real-time preview of the next number to be assigned (e.g. FACT-2026-0003)
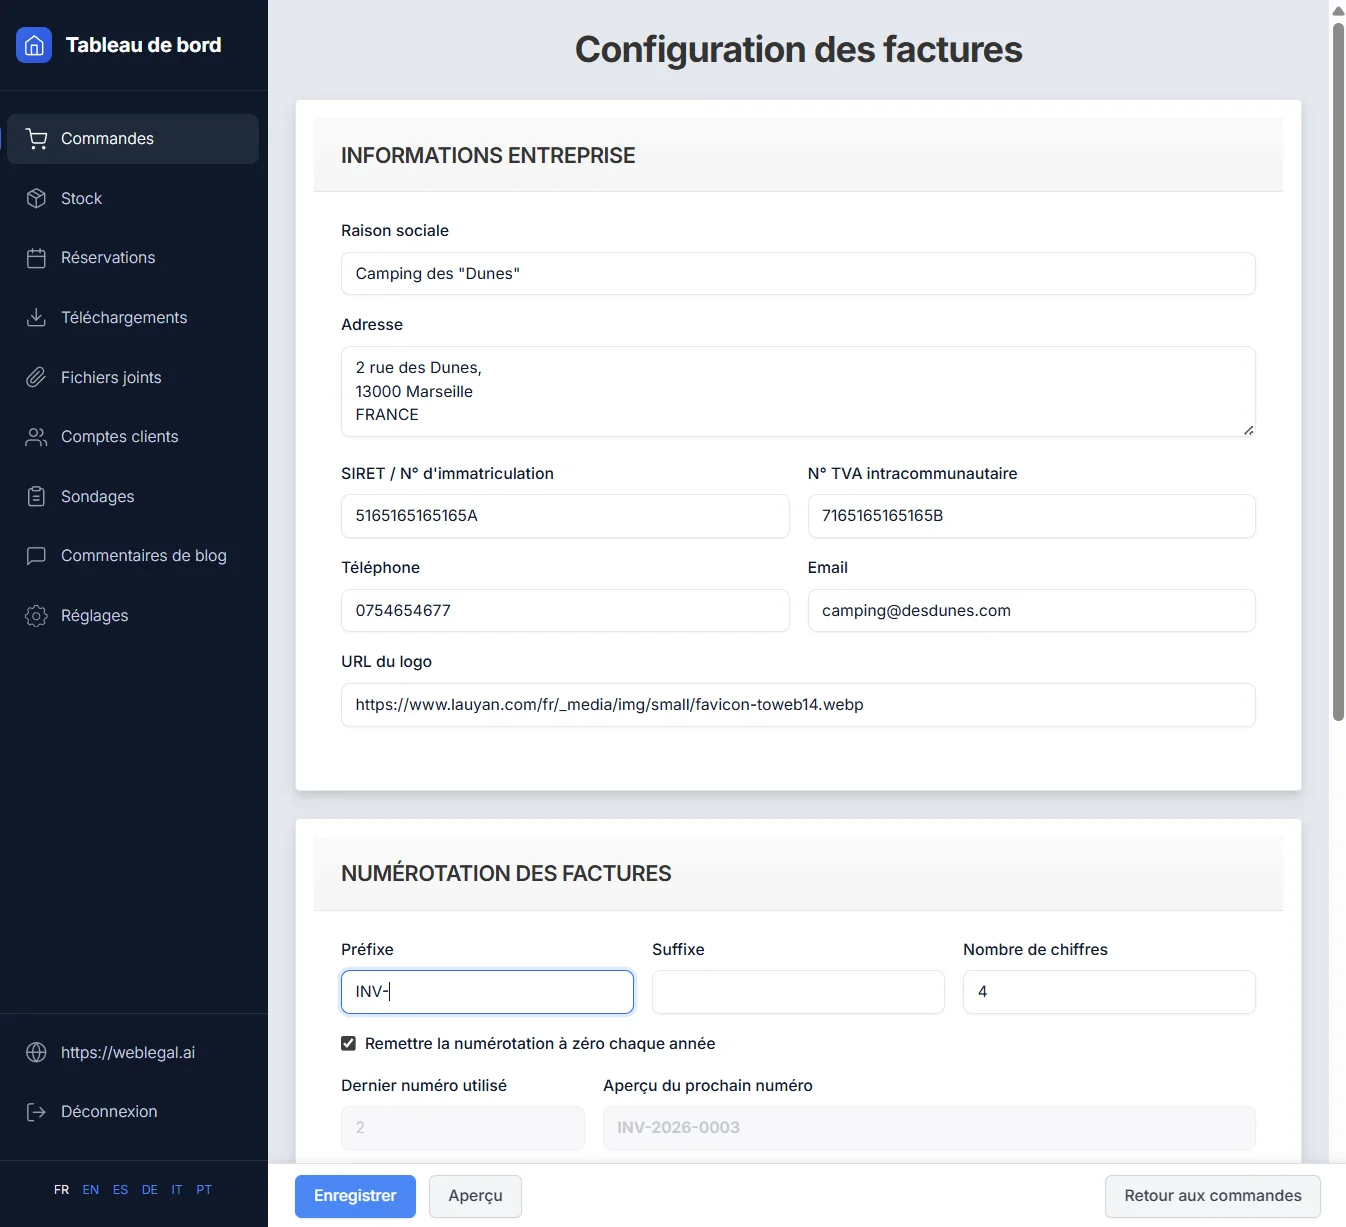
A "Preview" button lets you see what your invoice will look like before generating a real one.
Step 3: Generate and send your invoices
Invoicing fits naturally into your everyday workflow.
When you change the status of an order — for example when a payment arrives and you move the order from "Awaiting payment" to "Payment confirmed" — a dialog box offers to:
- tick "Generate invoice" to create the invoice automatically
- notify the customer by email with a customisable message
In this message, simply insert the variable {INVOICE} and the link to the invoice will be automatically included in the email sent to the customer.
Sample notification message:
Hello, we have received your payment and will let you know as soon as preparation of your order begins.
Your invoice: {INVOICE}
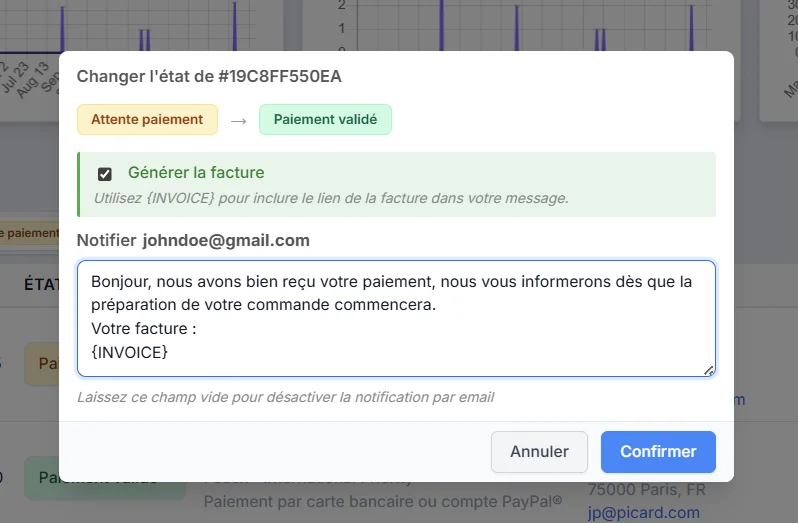
The customer then receives an email containing a direct link to their invoice. No attachment to manage, no extra steps.
For orders that have already been confirmed, a green "Invoice" button appears directly in the list of orders. One click is all it takes to generate or view the corresponding invoice.
Everything included, nothing to install
Unlike solutions that require an external cloud service or a monthly subscription, TOWeb invoicing runs directly on your hosting. Your invoices are stored on your server, under your full control.
The back-office is available in 6 languages (French, English, Italian, Spanish, German, Portuguese) to suit your international customers.
Available now
Built-in invoicing is available from the TOWeb 14.04 update and included in the e-Commerce edition (as well as in the Studio edition).
Already using TOWeb e-Commerce? Update and enable invoicing in just a few minutes.
Don't have the e-Commerce edition yet? Now is the time to take your online shop up a gear
Licence upgrade to TOWeb 14 E-Commerce or Studio
To upgrade:
→ Install TOWeb 14 on the computer where your current version of TOWeb (1 to 13) is installed, launch TOWeb 14 and click Licence / About in the File step.
→ Or have your latest TOWeb purchase invoice to hand and go to the licence upgrade page for TOWeb V14
If you have any difficulty, you can contact our sales team via our contact form.
All the new features introduced in TOWeb 14 are detailed on the following page:
→ All the new features in TOWeb 14