

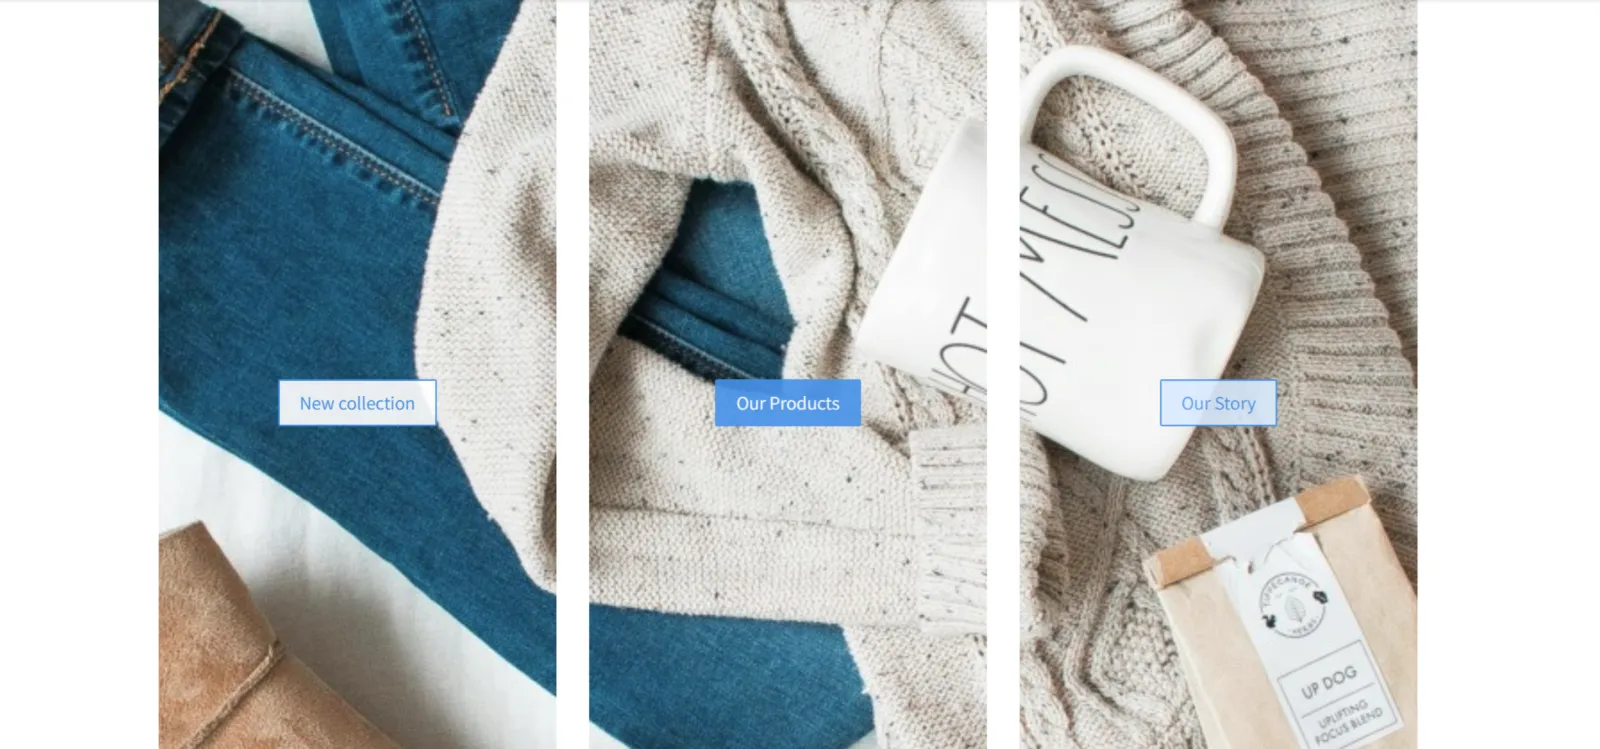
The Shopik template is an example of a TOWeb 13 site in which an image appears to have been cut into 3 pieces when in fact it is one and the same image reused 3 times. How can you add this kind of effect to your website without necessarily using that particular template? That is what we will explain in this tutorial, so you can achieve the same result with your own images on any page of your site.
- Case 1: If your site was built from the Shopik template and you only want to replace the home page image with your own, simply select each of the 3 paragraphs on the home page in turn and add the same image file to each one as a background using the "Change image" button. That's all!
Important: it must be exactly the same photo added each time, without any retouching, cropping or the slightest change on your part.
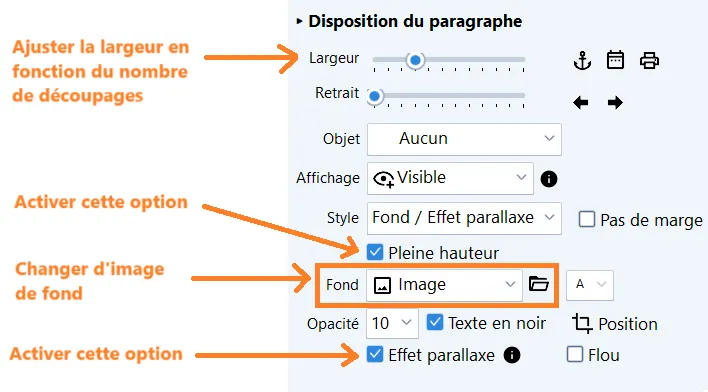
- Case 2: If your site was not built from the Shopik template and/or you would like your image to be split not into 3 but, for example, into 2 or 4, and possibly on another page too, here is how to proceed:
- Start by adding a paragraph with very little content, for example no title, just a few words and/or a link placed in a button
- Once this paragraph has been created, give it a width of 4 out of 12, i.e. 1/3 of the page width each if you want a split into 3 parts as in Shopik (or set the width to 3 out of 12, i.e. 1/4 of the page width, if you want a split into 4 parts)
- Then under "Background", select "Image" to add your photo
- Next, enable the "Full height" and "Parallax effect" options. These 2 options combined are required to get the split effect.
- Finally, use the "duplicate" button to copy your paragraph as many times as needed to fill the width of your page.
And there you go: all that's left is to replace the text of each paragraph with the one of your choice (for example links in buttons, as in the Shopik template), possibly changing the text colour and/or applying an "Opacity" effect depending on your photo so that your text stays easy to read on your background image. Finally, if the split with spacing doesn't suit you, you can tick the "No margin" box to get your whole background image with the text of your different paragraphs placed on top of it.
To keep your text well suited and always readable on all types of devices (especially tablets and smartphones), you will need to limit the content of your paragraphs to just a few words and/or avoid using too large a font size. And if you later just want to change the background image, you will only need to make the replacements described in case 1.
Notes:
- Make sure you use a photo with a fairly high screen resolution because, depending on the devices visiting your website, only certain portions may be displayed and your background image may lose sharpness if its resolution is not sufficient. Likewise, to prevent your background image from being stretched/zoomed too much, we recommend using a fixed-width site: this will stop your background image from becoming blurry on large screens with resolutions higher than the width of your photo.
- To reuse an image already present in your site, you can hold down CTRL while clicking the add image button.